Final Project: Rock, Paper, Scissors
Who: While designing this game our target audience was young adults enrolling in college, particularly those interested in a career in engineering.
What: Our project is a digital version of the classic, solve-every-argument game Rock, Paper, Scissors using AOI logic, Synchronous Counters, Seven Segment Displays, and LED's.
Why: We chose this project because it demonstrates a creative and fun real world application of concepts learned in engineering classes. The simplicity and universality of the concept will allow the technical components of the project to be explained easily. A good first impression of engineering is exactly what we want to leave our audience with; enough complexity to intrigue but not intimidate.
How: In order to design this game we basically went through the Engineering Process, however some specific steps include:
- Brainstorming/Sketching a Design
- Creating a Truth Table
- Creating K-Maps
- Identifying Min terms
- Brainstorm and Research Circuitry
- Use a Circuit Design Software to create a simulation of the circuit
- Refine
- Build a physical circuit on a Digital Logic Board
- Refine
Brainstorming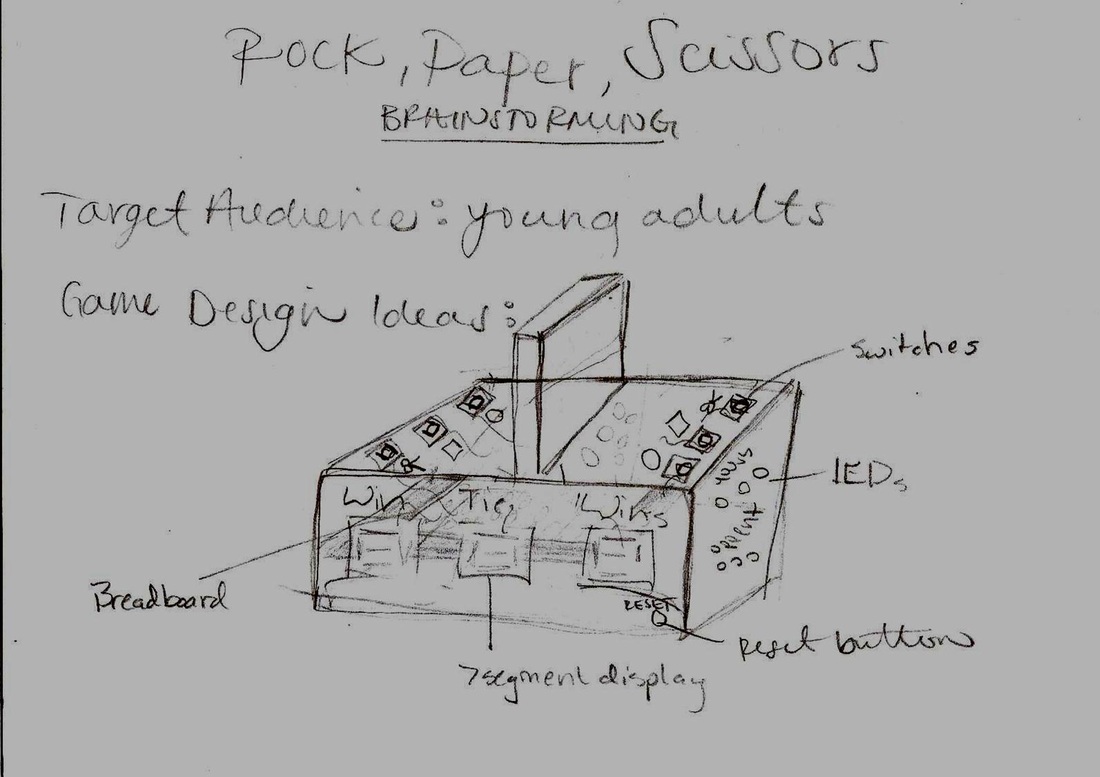
Our original design for the Rock, Paper, Scissors Game was to have three switches on either side of a box, split like the game battle ships to insure fairness, that selected either rock, paper, or scissors. There would be 3 Seven Segment Displays in the front of the box keeping track of the number of Wins on one side, Ties, and Wins by the other side. The DLBs would be inside of the box, possibly with a clear screen so that people could look at the actual circuit. There was also the option for LEDs to indicate which choice was selected on your side.
However, we encountered some problems. The first of which was that someone could simply flip all three switches. So we "switched" from switches to using buttons in the design, as well as adding that only one selection may be made on either side at a time as a constraint for our circuit. Designing the Circuitry
After we had defined our min-terms we then began designing the circuitry for the game. In order to do this we drew ideas from previous projects and assignments as well as from "circuit based" rock, paper, scissors games featured in the computer game Mine-craft. From these we realized that we would need a reset switch, NOR Logic, NAND Logic, MSI Synchronous Counters, and AOI Logic in varous orders and forms in order to finish our project.
.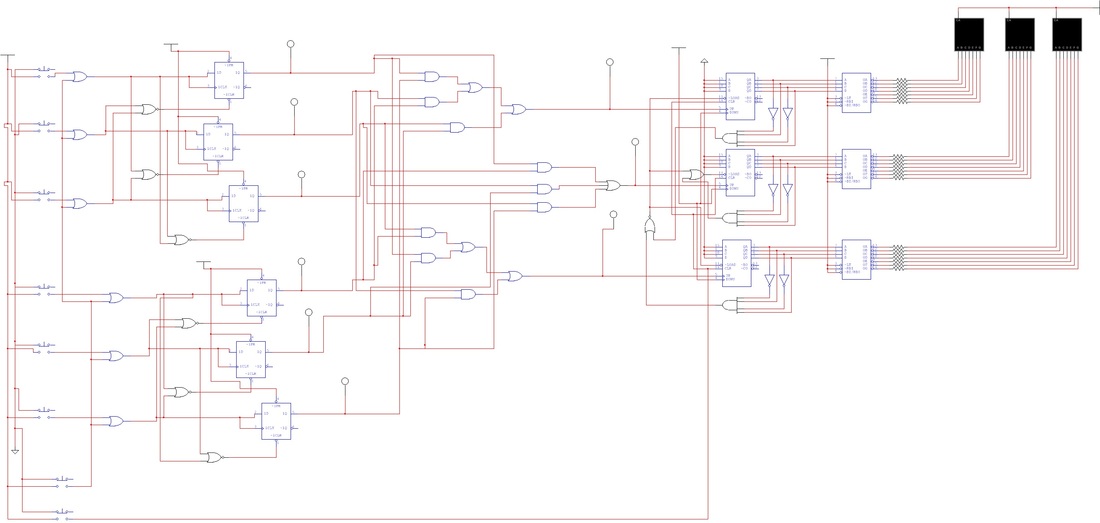
So we created our first simulation circuit. It worked well except we couldn't figure out how to create a Tie circuit. Eventually through some experimentation we figured it out, unfortunately around that time we realized that we really didn't need a tie counter, however it is still in our design.
|
Identifying Min Terms
After having brainstormed a design concept it was time to begin the circuitry of our game. To begin we created a HUGE and almost unnecessary Truth Table. As you can see, all of the red options cannot happen because that would indicate that more than one selection had been made on a side. The green are selections that would result in a win or a tie, and the white are selections when only one side has selected.
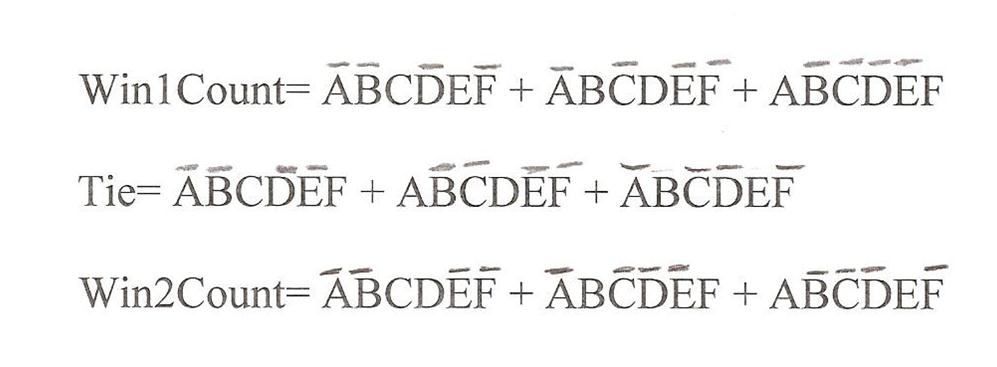
From that we identified some rather large minterms that we thought we could shorten by K-mapping.
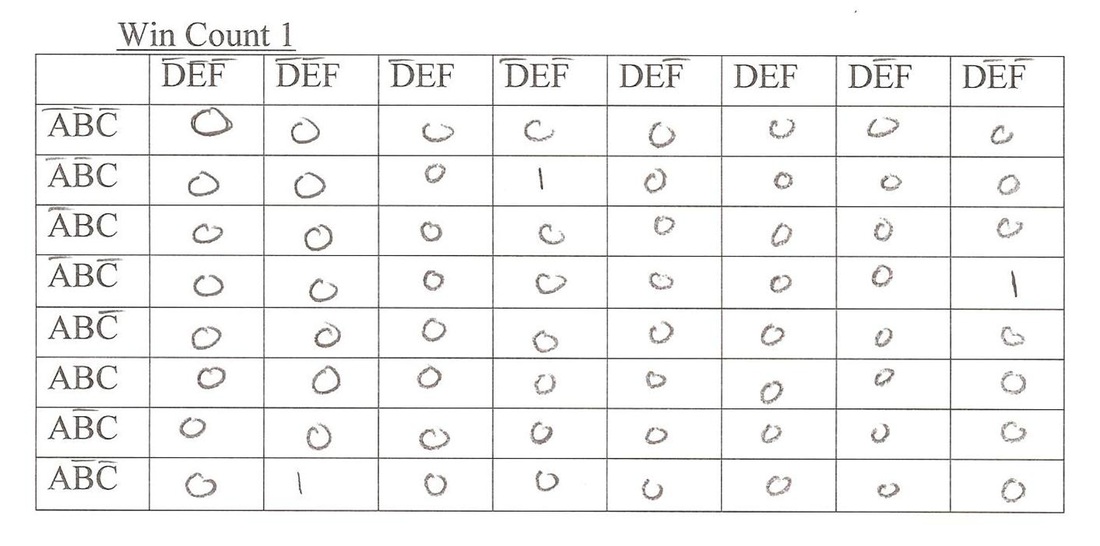
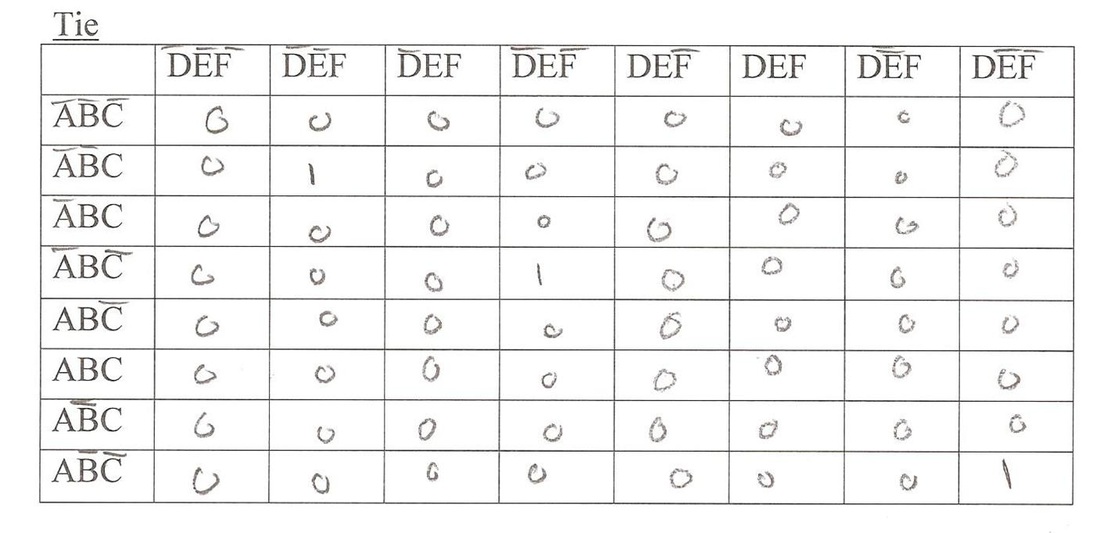
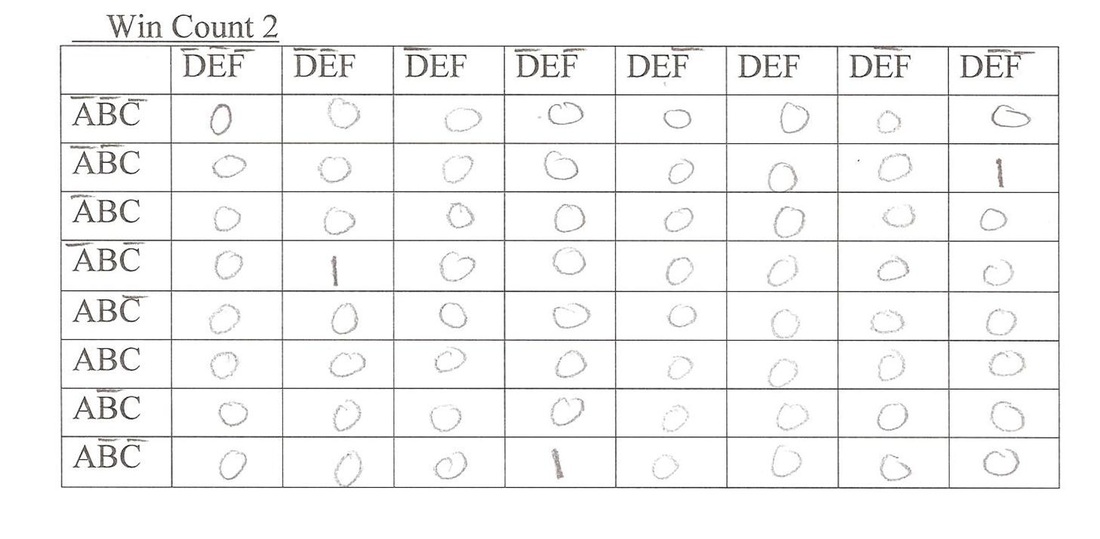
Unfortunately after all of that K-mapping our Minterms were still exactly the same.
|
Physical Prototype
Building the physical prototype for this project has been incredibly difficult. My group has already but 32 man hours into wiring it, do in part to strange set backs like having to go buy new resistors, or new small DLB attachments, but also because the circuit is just incredibly large. It takes two and a half DLBs in order to wire, and that is not being generous with space. In order to make the circuit fit with our limited resources we had to be scrupulous with our wires, so that we wouldn't run out of wire or space. Unfortunately after all of our hard work the circuit simply isn't working. Every wire has been checked and rechecked next to the simulation and EVERYTHING is in order. However, I suspect that the problem is related to the problems we encountered with the Now Serving circuit. It has to be those buttons! We have already bought new batteries for our circuit, so I know that it isn't that. We also have tried hooking up two batteries to the circuit just in case one battery just wasn't cutting it but still no dice. If I had more time I would like to try wiring the buttons through D-flip flops as we did in the Now Serving Project, that might help. However, the problem doesn't seem to be based solely around the buttons because for some reason every OR gate is freaking out and outputting a signal of 1 no matter what is plugged into it. Maybe the board is faulty? Anyway I do think that the D-flip-flops would be worth a try. However, tomorrow is my last day of high school, I still have a few difficult finals, and it is 4AM, so I am going to bed and I wish my group the best of luck finishing the project. Oh, and we also built a nice container for our circuit once it has been completed.
